How to Activate eSIM on iPhone: A Detailed A to Z Guide

eSIM is gradually replacing physical SIM cards thanks to the convenience and flexibility it offers on iPhone. This article will guide you through how to activate eSIM on iPhone from A to Z, including the requirements, detailed setup steps, and how to use eSIM while traveling, helping you stay connected reliably in every situation.
What is eSIM? Benefits of using it on iPhone
eSIM is a form of electronic SIM built directly into the iPhone’s motherboard, replacing the traditional physical SIM card. With eSIM, users do not need to remove or insert a plastic SIM card; they only need to scan a QR code or install the carrier profile through an app to activate and use mobile service.
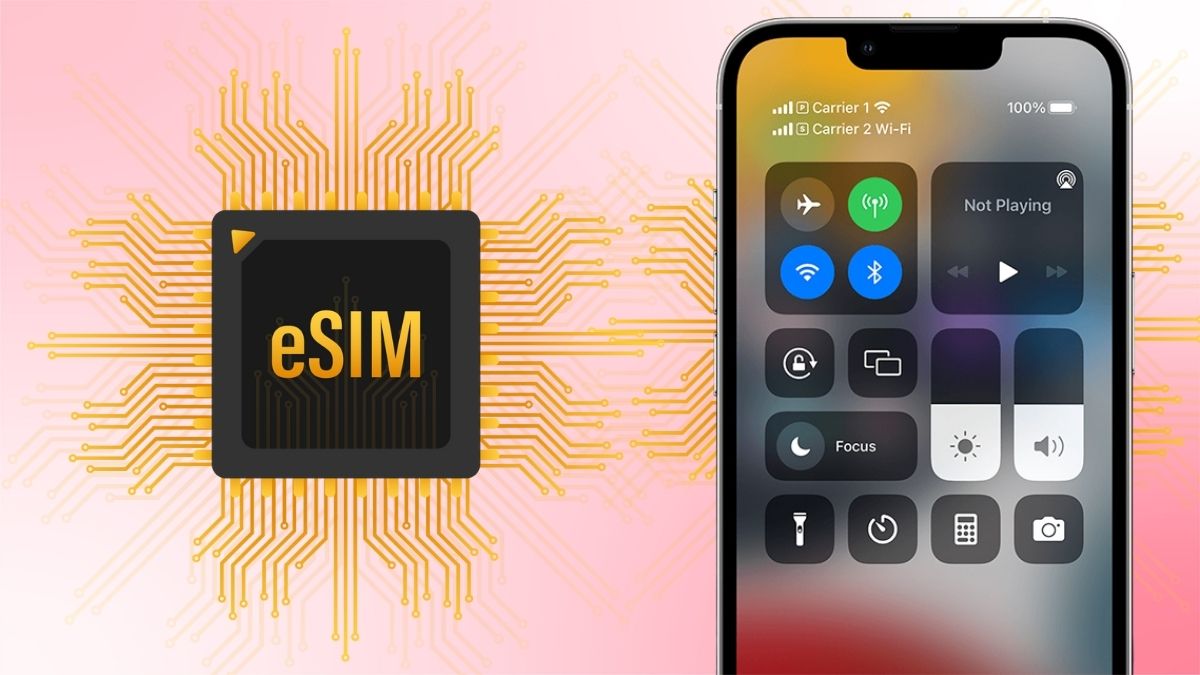
eSIM technology makes iPhone more compact while also delivering a flexible and modern connectivity experience, especially suited to digitalization trends and the need to use multiple phone numbers on a single device.
Key benefits of using eSIM on iPhone:
- Space-saving: No physical SIM card is needed, allowing multiple phone numbers to be used on the same device at the same time.
- High security: eSIM cannot be removed, helping maintain connectivity and support iPhone location tracking if it is lost.
- Flexible switching: You can store multiple eSIM plans and switch quickly in just a few steps.
- Convenient for travel: Easily install a new plan when traveling for work or leisure without needing to buy a physical SIM.
Requirements and current iPhone models that support eSIM
To successfully activate eSIM on iPhone, your device needs to meet some basic technical requirements. Checking these factors in advance will help the setup process go quickly and reduce errors.
- iPhone models that support eSIM: Apple supports eSIM starting with iPhone XS, XS Max, and XR. Later generations such as iPhone 11, 12, 13, 14, 15, 16 and iPhone 17 are all compatible, and newer iPhone models allow using multiple eSIMs at the same time.
- iOS operating system: iPhone running iOS version 12.1 or later. To ensure compatibility and reduce errors, you should update iOS to the latest version.
- Device status: The iPhone must be an unlocked international version so it can add eSIMs from multiple carriers. Locked or carrier-locked devices usually do not support installing eSIMs outside the original carrier.
- Internet connection: Throughout the activation process, the iPhone needs a stable Wi-Fi connection to download and install the eSIM profile.
Once the above conditions are met, activating eSIM on iPhone will become smoother and more seamless, making it easy to move on to the next setup steps without interruption.
See more: How to activate travel eSIM: A detailed guide for beginners
How to activate eSIM on iPhone
Activating eSIM on iPhone has now become simpler. Depending on the code format sent by the provider, you can choose one of the two common methods below:
How to activate eSIM with a QR code
Activating eSIM on iPhone with a QR code is the most commonly used method today and is supported by most carriers such as Viettel, VinaPhone, and MobiFone. With just an iPhone connected to Wi-Fi and the QR code provided by the carrier, you can install eSIM yourself at home without going to a store.
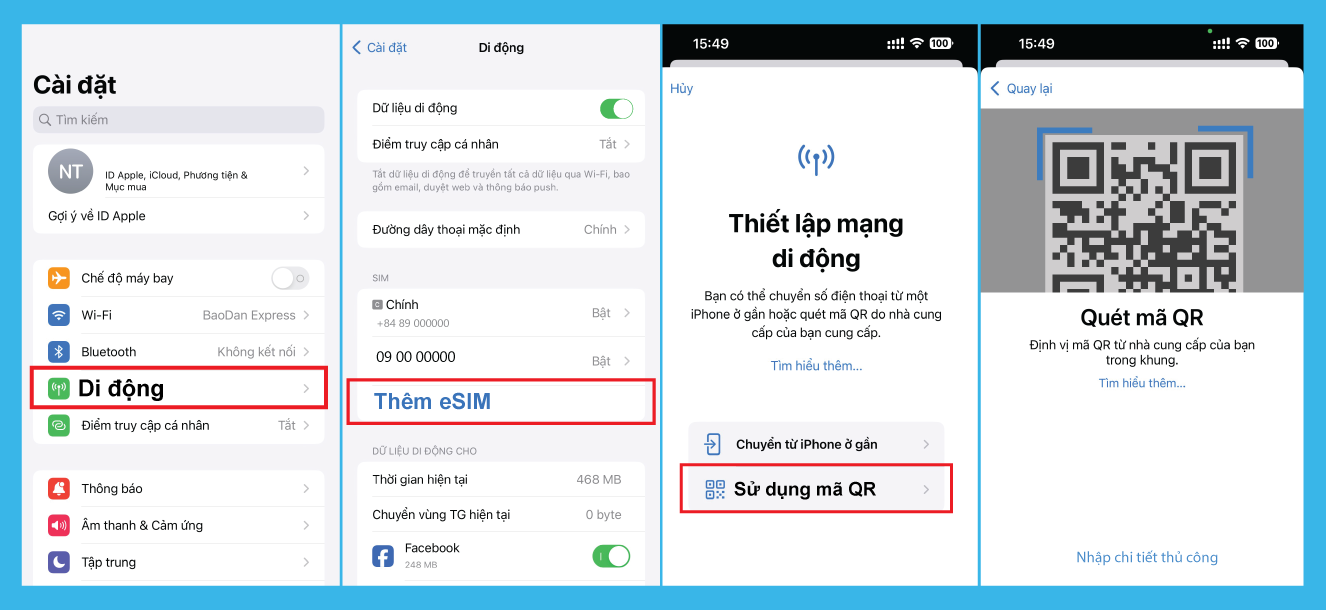
Step 1: Open Settings on iPhone, then select Cellular (Cellular). This is where all SIM and eSIM services on the device are managed.
Step 2: Tap Add eSIM (Add eSIM) or Set Up Cellular (Set Up Cellular) to begin the process of installing a new eSIM.
Step 3: Choose Use QR Code (Use QR Code). At this point, the iPhone camera will be activated to scan the code.
Step 4: Point the camera at the eSIM QR code provided by the carrier (via email, text message, or printed card). Make sure the QR code is clear and placed within the frame.
Step 5: The iPhone will display the plan information. Just follow the on-screen instructions and confirm the setup to complete the activation process.
How to activate eSIM manually
If you do not have another device to display the QR code or the phone camera has a problem scanning it, iPhone still allows you to activate eSIM by entering the technical details manually. This method ensures you can still install eSIM accurately and quickly.
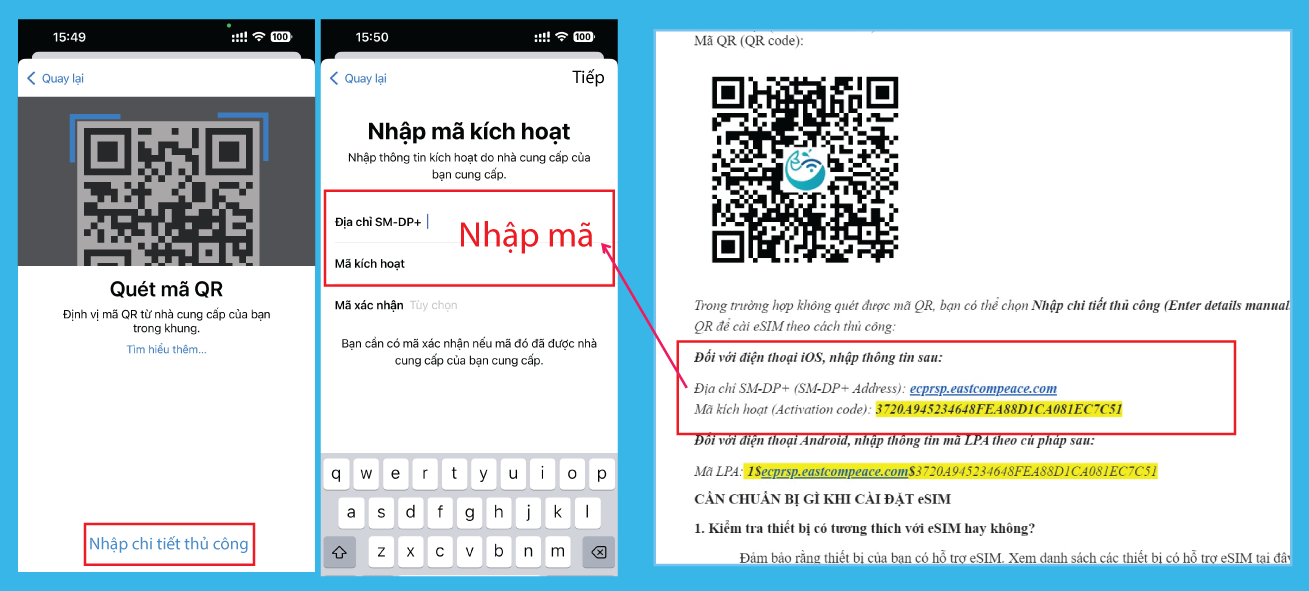
Step 1: Similarly to the method above, go to Settings (Settings) > select Cellular (Cellular) > tap Add eSIM (Add eSIM).
Step 2: On the QR code scanning screen, look down to the bottom and choose Enter Details Manually (Enter Details Manually).
Step 3: At this point, the system will ask you to enter important information including:
- SM-DP+ Address: This is the carrier’s server address.
- Activation Code: The character string identifying your plan.
- Note: This information is usually included in the confirmation email when you register for eSIM.
Step 4: After entering all the information, tap Next (Next) in the top-right corner of the screen. The iPhone will proceed to authenticate with the carrier’s server.
Step 5: Wait a moment for the activation process to complete. When the carrier name appears in the mobile SIM list, the installation has been successful.
How to activate international travel eSIM
To use a travel eSIM, simply go to Settings > Cellular >Add eSIM and scan the QR code sent by the provider. Installing it in advance from Vietnam helps the iPhone recognize the international network configuration, so the device can connect to the Internet as soon as you land, while still keeping your primary SIM to receive calls, messages, and bank OTP codes.
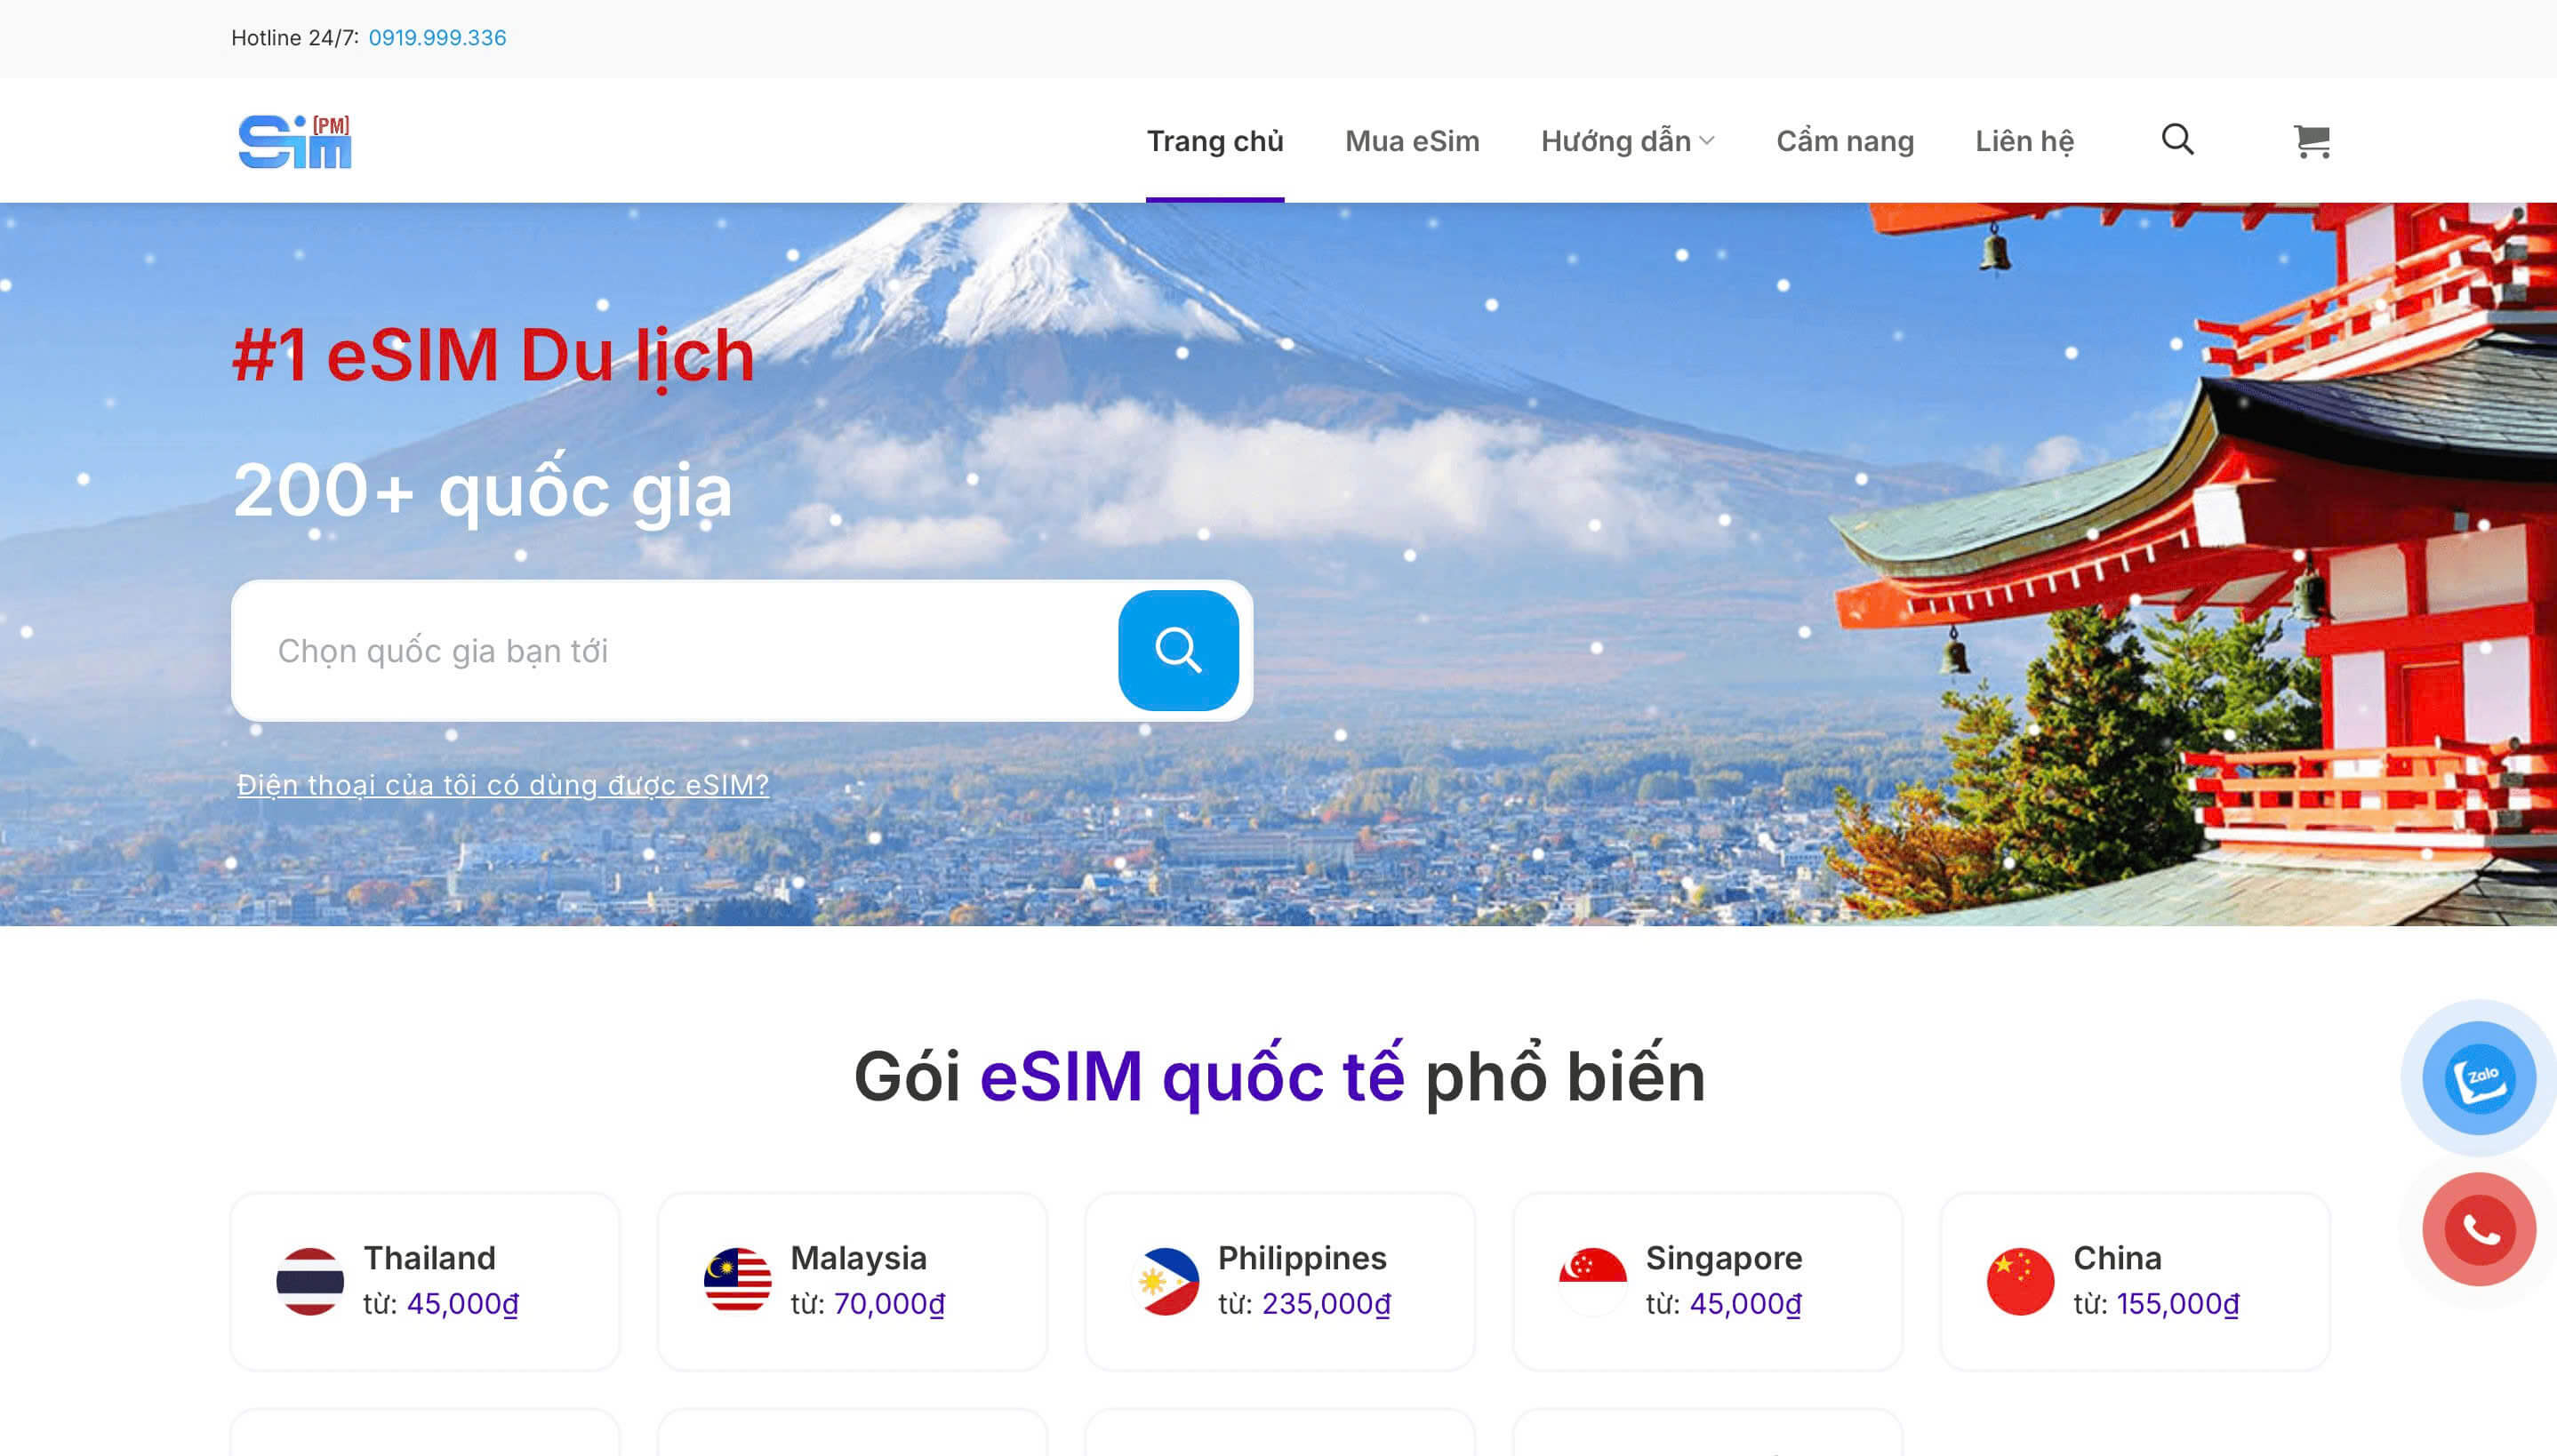
When using it abroad, if technical issues arise, reputable providers such as SimPM usually provide 24/7, ensuring timely support even across time zones. After a successful scan, you only need to turn on Data Roaming for the eSIM to access high-speed mobile data, making your trip smoother and more reassuring.
See more: Thailand eSIM 3 days: Convenient connectivity in Thailand
Converting a physical SIM to eSIM directly on iPhone
If you are using a physical SIM and want to switch to eSIM to free up the SIM slot for another purpose, iPhone now supports the eSIM Quick Transfer (Quick Transfer) feature, allowing you to do it directly on the device without going to a store.
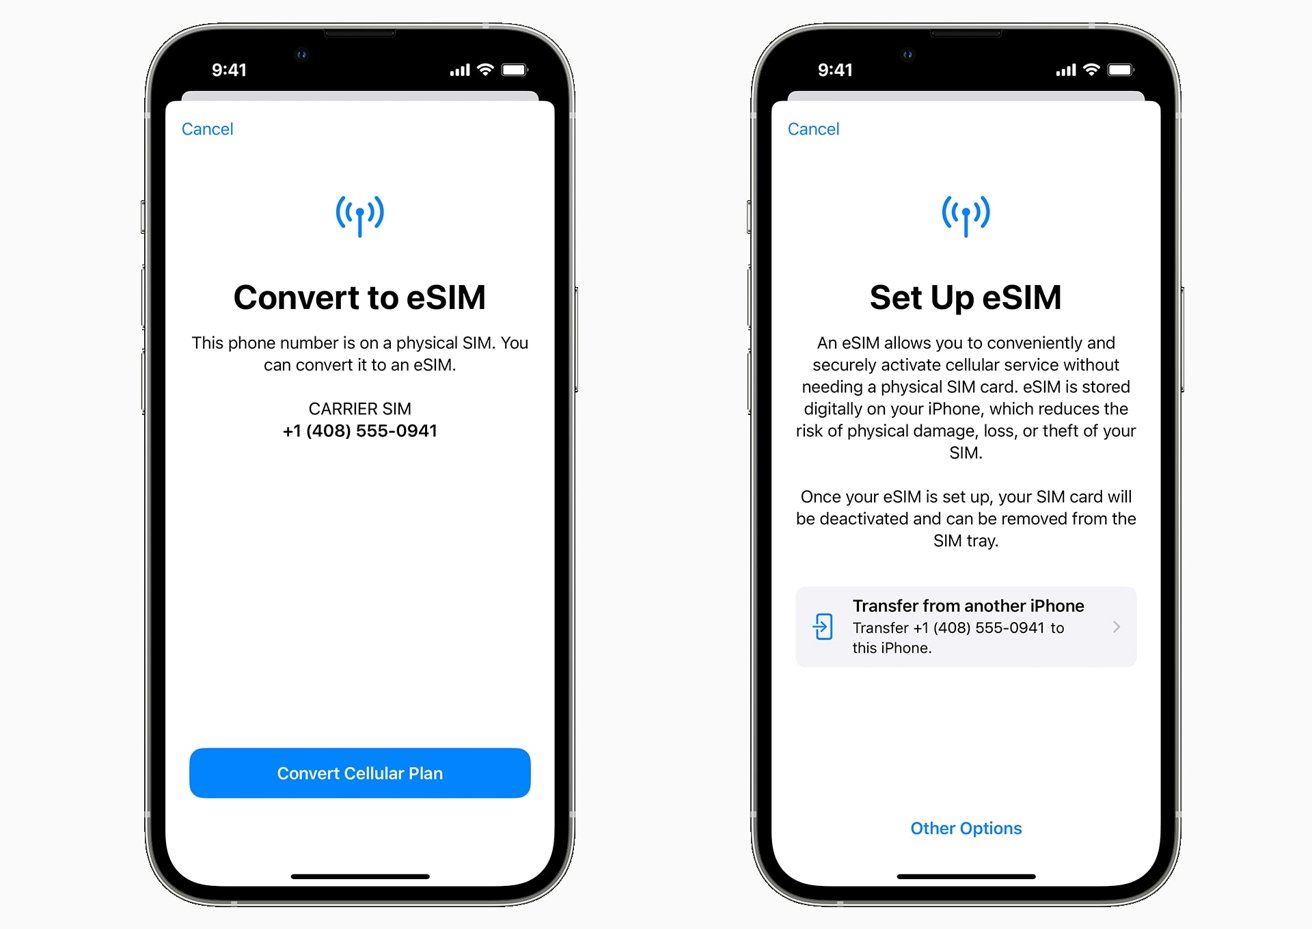
How to do it:
- Step 1: Go to Settings (Settings) > select Cellular (Cellular).
- Step 2: Tap the option Convert to eSIM (Convert to eSIM). This option only appears if your carrier supports direct conversion on the iPhone configuration.
- Step 3: Tap to confirm Convert Cellular Plan. The system will ask you to confirm once more to complete the digital profile synchronization process.
- Step 4: Wait a moment for the iPhone to activate the new eSIM. When the signal bars appear, you can remove the old physical SIM card from the device because it has officially been deactivated.
How to set up and manage 2 SIM
After successfully activating eSIM on iPhone, you will see two signal bars side by side at the top of the screen. To optimize the experience and avoid confusion about charges, you should make the following management settings:
- Labeling SIMs: Go to Settings > Cellular, select the phone number and set labels such as “Primary”, “Work”, or “Travel”. If you are using an international eSIM plan from SimPM, having a clear label helps you easily distinguish and choose the correct SIM when you need to access high-speed Internet abroad.
- Choosing the default line: In the Default Voice Line section, choose the phone number you want to use for calls and text messages. For contacts already in your address book, iPhone will automatically remember and prioritize the SIM you last contacted them with.
- Set up mobile data: You can proactively choose which SIM will be responsible for Internet access 4G/5G. Don’t forget to turn on “Allow Cellular Data Switching” so iPhone automatically switches to the other SIM when the one in use has weak signal or loses service.
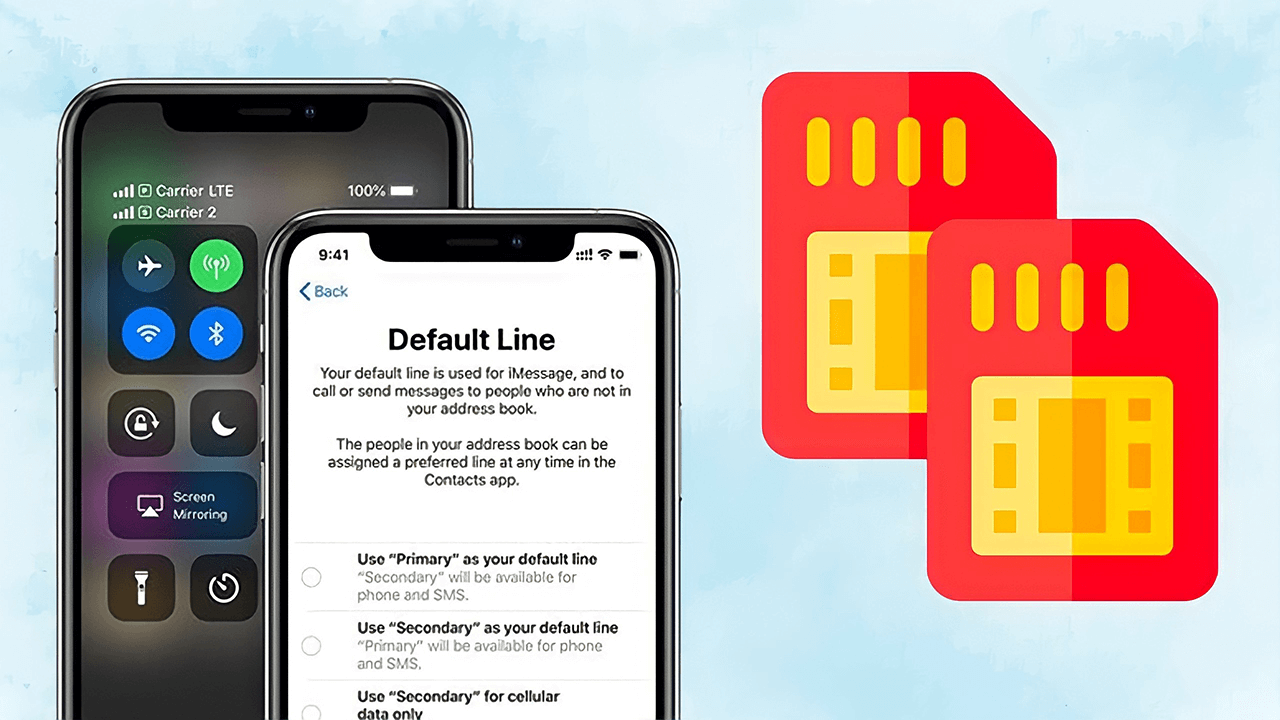
Using 2 SIM on iPhone helps you clearly separate work and personal life, as well as calls and data. You can keep your primary SIM for calls, texts, and OTP codes, while using the other SIM for Internet, ensuring stable connectivity and more effective cost control.
Troubleshooting common issues and notes when using eSIM
Although the setup process is quite simple, users sometimes still encounter some technical obstacles. Understanding the common situations below will help you resolve them quickly and keep your connection stable:
- Cannot scan the QR code: Usually caused by weak Wi-Fi or an expired code. Check your Internet connection again or switch to manual entry of the SM-DP+ address and activation code.
- Error “Could not complete cellular changes”: Common on carrier-locked iPhones. Before installing, make sure the device is an unlocked international version.
- No signal after installation: The iPhone may need a few minutes to sync. If you still do not see signal bars, try turning Airplane Mode on and off to refresh the connection.
- Turn on Data Roaming: For international travel eSIM, this is a required step to access the Internet abroad.
- eSIM activity limit: iPhone 13 and later only allows up to 2 SIMs to be active at the same time. To use a new plan, turn off some of the SIMs that are currently on.
- Do not delete the eSIM casually: Deleting the eSIM will remove the carrier profile and may result in fees or reissue procedures for the code.
We hope this article has helped you understand how to activate eSIM on iPhone and use it confidently in any situation. If you still have questions or run into issues during setup, you can contact us SimPM for timely support. The 24/7 technical team is always ready to support you, helping you maintain a stable connection and peace of mind throughout every journey.